
The vacation photos looked perfect until Zara noticed them. Dark, stubborn footprint marks stamped across her favorite white sandals, making it painfully obvious she’d worn them every single day of her two-week Mediterranean trip. What should have been a beautiful reminder of sun-soaked adventures now looked like evidence of neglect.
“I can’t believe I spent $150 on these,” she muttered, holding up the stained leather sandals that had once been pristine. The footprints weren’t just surface dirt – they were deep, ingrained marks that seemed permanently etched into the material.
If you’ve ever owned a pair of light-colored sandals, you know exactly what Zara was dealing with. Those telltale footprint marks are the bane of every sandal lover’s existence, turning beautiful footwear into embarrassing reminders of wear and tear.
Why Your Sandals Develop Those Stubborn Footprint Marks
Before diving into the solution, it helps to understand what’s actually happening to your sandals. Those dark marks aren’t just dirt – they’re a combination of dead skin cells, natural foot oils, sweat, and environmental debris that bonds with your sandal’s material over time.
The problem is especially pronounced with lighter-colored sandals made from leather, suede, or fabric materials. Every step creates friction, and that friction combined with moisture creates the perfect storm for permanent-looking stains.
The key is understanding that most people think these marks are permanent, but they’re actually just deeply embedded organic matter that can be lifted with the right approach.
— Dr. Amanda Chen, Materials Science Researcher
Most people make the mistake of scrubbing aggressively with soap and water, which often just pushes the oils deeper into the material or damages the sandal’s finish. The real solution is surprisingly simple and uses ingredients you probably already have at home.
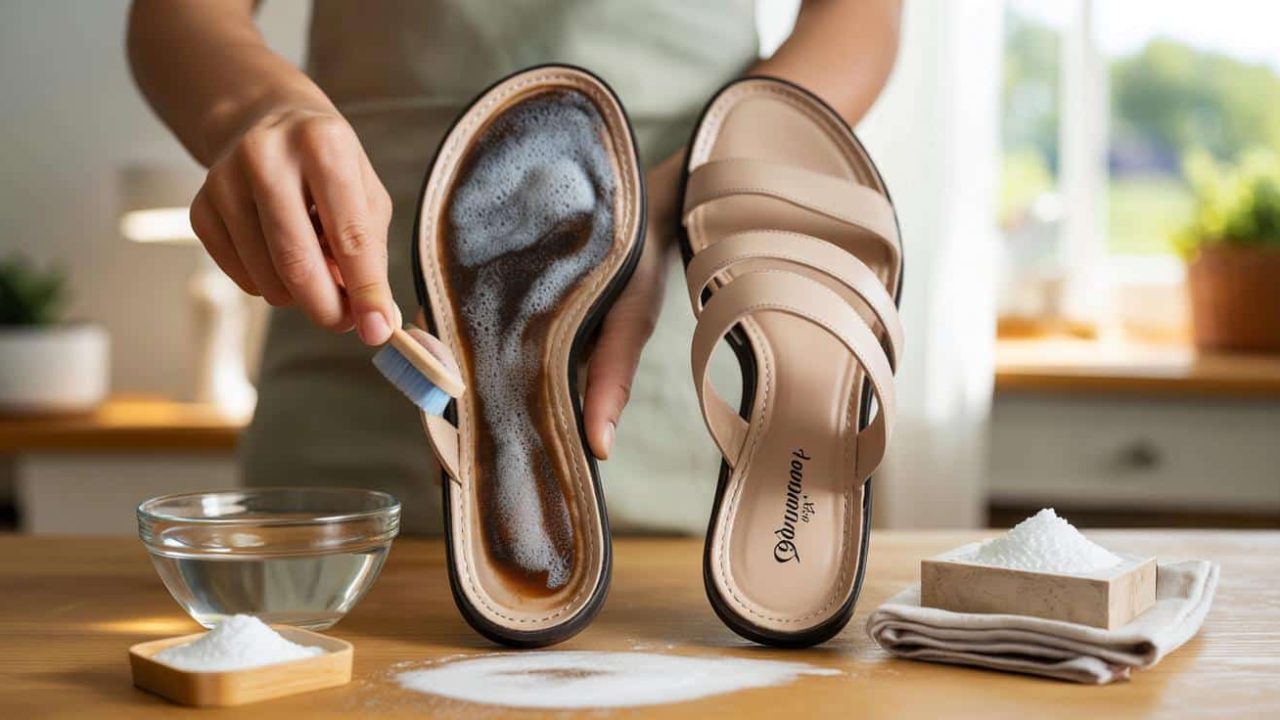
The Game-Changing Baking Soda Method
Here’s the method that’s been quietly circulating among shoe repair professionals and has saved countless pairs of sandals from the donation pile. It works on leather, synthetic materials, and even fabric sandals.
What You’ll Need:
- 3 tablespoons of baking soda
- 1 tablespoon of white vinegar
- 1 tablespoon of dish soap (preferably clear)
- An old toothbrush or soft scrub brush
- Clean cloth or paper towels
- Small bowl for mixing
The Step-by-Step Process:
| Step | Action | Time Required |
|---|---|---|
| 1 | Mix baking soda, vinegar, and dish soap into paste | 2 minutes |
| 2 | Apply paste to footprint marks, let sit | 15 minutes |
| 3 | Gently scrub with toothbrush in circular motions | 3-5 minutes |
| 4 | Wipe clean with damp cloth | 2 minutes |
| 5 | Air dry completely | 2-4 hours |
The magic happens when the alkaline baking soda meets the acidic vinegar. This reaction creates a gentle but effective cleaning action that breaks down the oils and organic matter without damaging your sandals’ material.
I’ve been using this method in my shop for over a decade. Customers bring in sandals they’re ready to throw away, and we can restore about 90% of them to like-new condition.
— Marcus Rodriguez, Shoe Repair Specialist
For particularly stubborn marks, you might need to repeat the process twice. Don’t be tempted to scrub harder – patience and repetition work better than force.
Special Considerations for Different Sandal Materials
While the basic method works across most materials, certain types of sandals need slight modifications to avoid damage.
Leather Sandals: After cleaning, apply a small amount of leather conditioner to prevent cracking. The cleaning process can remove natural oils from the leather.
Suede Sandals: Use a suede brush instead of a toothbrush, and work in one direction only. Allow extra drying time and brush again once completely dry.
Fabric Sandals: These respond best to the standard method, but you can add an extra tablespoon of dish soap for more cleaning power.
Cork Footbeds: Be extra gentle and use minimal liquid. Cork can absorb too much moisture and become damaged.
The biggest mistake people make is using the same cleaning method on every type of sandal. Each material has its own needs, and respecting those differences is what separates good results from great ones.
— Lisa Thompson, Footwear Care Expert
Prevention Tips That Actually Work
Once you’ve restored your sandals to their former glory, keeping them that way becomes much easier with a few simple habits.
The most effective prevention method is surprisingly simple: baby powder or foot powder before wearing your sandals. A light dusting on your feet creates a barrier that absorbs moisture and reduces the oils that cause staining.
- Rotate between multiple pairs of sandals to give each pair time to fully dry
- Wipe down sandals with a damp cloth after each wear
- Store sandals in a dry, ventilated area
- Apply protective sprays designed for your sandal’s material
- Address small marks immediately rather than waiting for deep stains
For people who wear sandals daily, investing in removable insoles can be a game-changer. They’re much easier to clean or replace than trying to restore the entire sandal.
When Professional Help Makes Sense
While this DIY method works for most situations, some sandals benefit from professional restoration, especially expensive designer pairs or vintage sandals with sentimental value.
Consider professional cleaning if your sandals are made from exotic leathers, have complex hardware that could be damaged by DIY methods, or if the footprint marks cover intricate stitching or detailing.
Sometimes the cost of professional restoration is worth it when you consider the replacement value. A $30 professional cleaning can save a $200 pair of sandals.
— David Park, Luxury Footwear Restoration
The key is knowing when to tackle the problem yourself versus when to seek expert help. Most everyday sandals respond beautifully to the baking soda method, while specialty footwear might need professional attention.
FAQs
How often can I use this cleaning method on my sandals?
You can safely use this method once a month during heavy wear periods, but for best results, try to clean small marks weekly rather than waiting for deep stains.
Will this method work on colored sandals too?
Yes, but test on a small, hidden area first to ensure the cleaning paste doesn’t affect the color or finish.
Can I use this method on sandals with memory foam?
Be extra cautious with memory foam footbeds as they absorb liquids easily. Use minimal paste and ensure thorough drying to prevent mold.
What if the footprint marks don’t come out completely?
Try repeating the process after 24 hours. Very old or set-in stains might need 2-3 treatments to fully disappear.
Is it normal for sandals to smell after cleaning?
A slight vinegar smell is normal but should disappear within a few hours of drying. If odors persist, sprinkle with baking soda overnight.
Can I speed up the drying process?
Air drying is best, but you can use a fan to circulate air. Avoid direct heat sources like hair dryers which can crack or warp the material.